Monday, August 16, 2010

Make it Yourself Monday - Fried Catfish

Today is Make it Yourself Monday!! What is Make it Yourself Monday, you ask?? Well.... Make it Yourself Monday is a time set aside for me to make something instead of running to town to buy it. After you try out my make-it-yourself idea, go make something yourself. Blog about your make-it-yourself project. Leave a comment on my blog with a link to yours, and be sure to link back to my blog from yours. Simple as that!

For the last several weeks, I have really been craving some good fried fish from one of our local restaurants, Catfish King. But, they are WAY across town, AND they are expensive. I suppose they are no more expensive than any other restaurant, but when you're talking about paying for 6 people (yes, Baby Girl eats as much as the other kids, and Little Man eats as much as an adult!), you're talking about a LOT of money. On average, when we all go out to eat, we spend AT LEAST $50 or more. So, even though I have been really wanting some fried catfish, I have not wanted to drive or spend the money.

I got to work pulling out all my ingredients and getting the oil hot! What I ended up with is this:


I started by mixing up some hot-water cornbread and frying it. Then, Brient put in some breaded okra to fry. (I had to start over with my oil at that point, because it had too much cornmeal in the skillet and was starting to burn!) Next I dropped in the fish. All this time, I had a pan full of frozen french fries in the oven baking, which is much healthier than fried, although who's really keeping up with that considering all the other fried foods I made! I heated up some pinto beans I had cooked a few days earlier, pulled out my own homegrown, homemade green tomato relish, and washed up a few cherry tomatoes straight from my garden. YUM!

Everyone at the table, including Baby Girl, said it was so delicious! Baby Girl kept saying, "Nummy, nummy, nummy." Everyone kept thanking me for cooking! (You'd think I never cook anything for them!) It was all a big hit! And I didn't have to drive to get it, didn't have to sit in a restaurant waiting on food, and spent a fraction of what I would have paid for that meal. It was delicious!


The First Day of School

Generally, we don't start school until September 1, mainly just because of the fact that I CAN! However, this year, I just couldn't wait any longer! My friend, Kayla, sent me a link to an AMAZING lapbook that I just HAD to do with my kids! It's all about LEGO's! What a perfect way to start back to school - fun, no pressure learning. So today, we started our first day of school. Man, this is what homeschooling is all about!


Our day started out with dumping ALL the Legos onto the table. 


We first learned all about the inventor of Lego and the country from which he came (Denmark). The kids then made Lego flags of Denmark.
We watched a video about the capital of Denmark. And then, the kids spent several hours creating different things with Legos, such as robots and a Lego magic trick. 
This is Little Man's robot.

His robot transformed. 


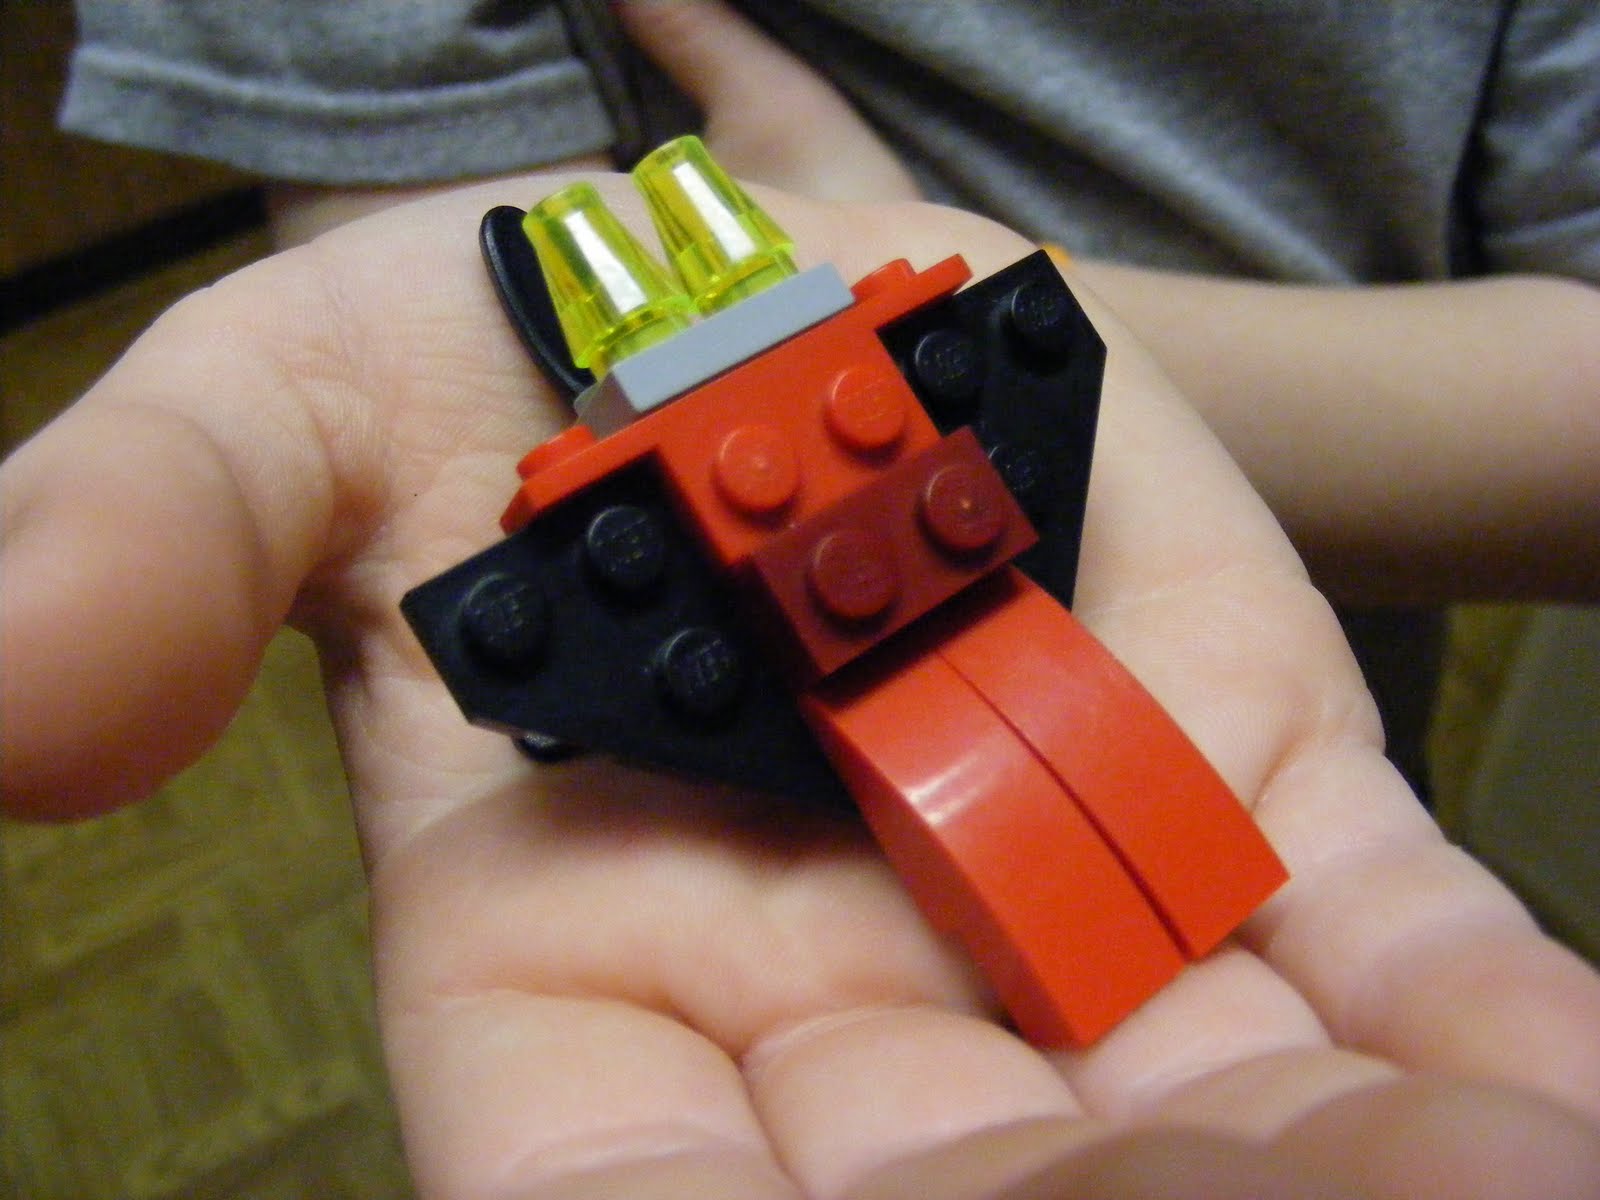
This is Little Man's personal Transformer mini-bot.


Here you have Britches' Lego magic trick. She built this from a plan on the Lego website, but she had to make some modifications, because it didn't work exactly right. Also, she didn't have the exact Lego pieces that she needed, so she improvised. You put a dime into the slot at the top, turn the wheel, and the dime "disappears." Actually, it falls through the hole and into your hand!


This is Little Sister's car that she built!


So that was our first day of school! Lots of fun, and no pressure! Tomorrow, we will do more Lego "stuff." This lapbook lesson lasts for four days, so we'll be through by the end of the week. So far, they are having a BLAST with this one! 

If you'd like to do this really fun lesson with your kids, check out Walking By The Way to find out all the great stuff you can do with Legos!!

Friday, August 13, 2010

Homemade Granola

Last Christmas, my sweet mama bought me a new cookbook. This isn't just any cookbook. It's a "Daily Harvest Bakery and Deli" cookbook. Daily Harvest is a local bakery and deli that prides itself on using fresh ground wheat, all natural sweeteners, and lots of other "good for you" things. But since they are all the way in town, and I live in the country, I am not able to just run up there for a nice, hot, fresh loaf of jalapeno cheese bread whenever I want it. I can't just swing in for a refreshing glass of wheat grass juice. I'm not able to stop by for a freshly made chocolate haystack cookie. But, I have the next best thing! I can make my own whenever I want. Now, I will admit that I don't have a grain mill, so I don't grind my own flour. But I do try to use all the same healthy ingredients that Teresa (the owner of Daily Harvest) uses, and all the recipes I have tried so far are WONDERFUL!

Today, I needed to make another batch of homemade granola, because that is what we eat many mornings for breakfast. I love the fact that the kids pick my healthy, homemade granola over the packaged sugary cereals! Several people have asked for the recipe, so I thought I would share. It's the only recipe I'm posting on my blog, though. You'll just have to go out and get your own copy of Teresa's book if you want to try the other recipes! And I assure you, you WILL want to try more!!

Just know, I did make some changes to the original recipe found in the book. I don't always keep things, like walnuts, and my kids like different fruits. Also, I like to change what I put in my granola, so we don't get tired of the same kind. Sometimes I make it like this, and sometimes I add cocoa powder to make dark chocolate granola. Play around with this recipe, and see how many different types of granola you can make!

Homemade Granola:

2 sticks butter
1 Tbsp. cinnamon (or more if you want a stronger spice taste!)
1 C. honey or agave nectar
8 C. rolled oats
2 C. pecan halves
1 C. coconut
1 C. dried cranberries
1/2 C. ground flax seed

Boil butter, cinnamon, and honey/agave nectar for 3 min. Pour over oats and stir well to coat. Add all other ingredients, and stir well. Pour into a large pan, and bake at 350 degrees for 10 minutes. Remove from oven and stir. Bake for 5 minute intervals, stirring after each interval. When your oats are golden brown and not soft and wet looking when you stir it, it's ready!

If you choose to make chocolate granola, add 3/4 C. cocoa powder to the butter, cinnamon, and honey/agave nectar mix and let it boil with the mix. It makes a delicious chocolate sauce to go on your granola.


Here is a picture of our finished granola. All I need to do now is let it cool, and then I can put it in my Rubbermaid reusable cereal box. 


After you try this recipe, go and get your own Daily Harvest Cookbook! You'll be glad you did!

Monday, August 9, 2010

Make it Yourself Monday - Baby Wipes

Yay hooray! Today is "Make it Yourself Monday"!! I have been waiting all week to share this one with you! Several of my friends are having babies or have recently had babies. So this is a perfect thing to tell you about today!

When I was pregnant with my first little one, a friend gave us a gift at one of our showers that was quite unusual to us. We were presented with homemade baby wipes, a container to keep them in, and all the supplies and the recipe to make more. We sort of wondered about them for a little while. But let me tell you, those baby wipes work better than any store bought wipes you can find, and they are far cheaper! So we have made these baby wipes ever since for each of our 4 babies. They are so good, in fact, that Brient has made them for himself to keep in his work truck to wash his hands before he eats when he's out in the middle of nowhere with no running water. They are great! Here's how to make them.


First, you start with a 10 cup round Rubbermaid container. I wrote the recipe on the side of my container, because I kept forgetting the amounts of each of the ingredients. You need:
2 3/4 cups of hot water
1 Tbsp. baby oil
2 Tbsp. baby bath


Generally, I use baby oil, but since I am out right now, I substituted olive oil. It is a very good oil for your skin. 


I also added a few drops of tea tree essential oil. Tea tree oil is antibacterial. Germs and infection can't survive when washed with tea tree oil. So this makes a perfect addition to help ward off diaper rash. It's not necessary to add this, though. You could also add any other essential oil for a nice scent. 


You need a roll of Bounty Select-A-Size paper towels and a good, sharp knife.


Cut the roll in half.


Pull the core out of the center.


Add the ingredients to your round container, and put the paper towel half in on top. 


Make sure the lid is on good and tight, and flip it upside down. This helps all the liquid to soak into all of the paper towel roll more quickly.


Once all the liquid is absorbed into the paper towels, you are ready to begin using them. You pull the wipes from the center of the roll. 

These wipes last for a very long time - much longer than a package of commercial wipes - and they are a fraction of the cost! These are so gentle on baby's bottom, mine have rarely ever had a diaper rash. I have always kept packaged wipes on hand for travel, as this container is rather big and bulky. But when I use the packaged wipes, my little ones nearly always end up with a rash. 

These are fantastic. I hope you'll give them a try. And if you don't have a baby, think about giving them as a gift to someone! This was one of the best baby gifts I ever received!

Monday, August 2, 2010

Make it Yourself Monday

My friend, Susan, has inspired me. She keeps passing on tidbits of information on her "Thrifty Thursdays" and "Frugal Fridays." So I decided to get in on the fun. And I encourage each one of you to get in on the fun as well! Here's how it will work. Every Monday (Lord willin' and the creek don't rise), I'll post something that I chose to make myself, instead of heading to the store to purchase. If you want to participate, too, leave me a comment below the post and include a link to your blog. Share on your blog something that you have made instead of purchased, and be sure to link back to my blog. It's that easy! I can't wait to see some of the great things everyone makes, and get some good ideas myself!

For today's "Make it Yourself Monday," I wanted to share a natural remedy with you. Saturday night, I got into some dust and other things floating in the air, and by the end of the night, I could feel my head starting to get congested. By Sunday morning, I was trying to decide whether or not to go to church, but I went anyway. I should have stayed home in the bed! I felt terrible! And by last night, my chest felt as though an elephant was standing on it!

Something you should know about me is that I really do not trust doctors - at all. (It takes everything in me just to take Little Man to see his endocrinologist, and I KNOW he HAS to do that!!) I never go to the doctor for illness. And rarely do I even take medicine. I prefer the "let it run its course" approach. God made my body to kill off whatever infection found its way in, so I prefer to just take it easy and let it do its job.

But just because I don't take over the counter meds to clear up a head and chest cold doesn't mean I don't do anything! This morning, I got up and poured myself a nice cup of hot herbal tea to help ease the pain in my chest. Besides herbal teas, there are numerous other natural options that God has provided to assist our bodies in the healing process.

Two of my favorite natural remedies are honey and ginger. Both of these are antibacterial, antiviral, and antimicrobial, which means, it doesn't really matter which type of germ or virus got in, it won't be able to survive! One of my favorite ways to use honey and ginger is to make a syrup out of the two. First, I gathered my ingredients.


I pulled a piece of ginger out of the freezer. I usually use freshly dug ginger from my herb garden. But, I had to buy some recently from our local Asian market, because I overharvested my ginger last year. I am letting it grow for awhile now without digging any of it, so it will multiply and I'll have plenty once again. When I bought this ginger, I washed it, peeled it, and put it in the freezer. Ginger will last longer in the freezer, and it's also easier to grate when frozen.


I also pulled out the jar of local honey that I bought last week from my good friend, Amy. She raises her own bees, and I sometimes buy from her. I love to have local honey on hand at my house just for occasions such as this.


I grated my ginger using the small side of my grater. I have used the large side before, but it makes it a little harder to chew. And if I'm adding this syrup to an herbal tea, I don't really like the chunks of ginger. So I grated it very fine. You can grate as much or as little as you want to use. It all depends on how big of a batch you intend to make.


The last thing I did was pour some of the honey over the ginger. You only want to add enough honey to completely cover the ginger. It ends up being about half of each ingredient. I stirred it up well, and now I am letting it sit for an hour or so while the liquid from the ginger is released into the honey.

That's it! That's all there is to making your own honey ginger syrup. You can use this to sweeten your favorite herbal tea, take it by the spoonful, or, my favorite way, pour it over some hot toast! This is a great NATURAL way to fight off the sickies! I made a batch that should get me through this terrible upper respiratory infection that I ended up with, and if I need more, I can just make up another batch. And I don't have to drop everything and run to the store for meds! It's all in my kitchen cabinet.

I read something on my box of tea this morning that said, "We don't have laboratories. We have kitchens." That is a great saying. God made the best medicines, and most of them are things that we use every day as food. Nothing created in a lab can come close to the natural remedies that God has provided.

I hope you enjoyed today's "Make it Yourself Monday," and I hope you'll head to your kitchen to give this recipe a try. Don't forget to leave me a comment, post a link to your blog that shows your "Make it Yourself Monday" idea, and post a link on your blog leading back to my blog.

And now, I'm going to make me some toast with honey ginger syrup, and then I'm going to take a NAP!

“Be who you are and say what you feel because those who mind don't matter and those who matter don't mind.” ~Dr. Suess